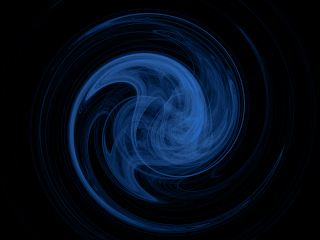
Then I was thinking I could maybe make one on my own with The Gimp.
I remembered that a time ago there was a post on the VectorLinux Forum on how to make some Fractal Backgrounds...
It is actually quite simple.
STEP 1: Make Image
This is the very simple method to follow:
- Open gimp.
- Set Foreground color to Black (it should be black by default)
- In menu, select File --> New
- In Create a New Image, select the desired resolution.
- Also set Advanced --> Fill Select to "Foreground Color"
- Optional: Click on greyscale bar and set the gradient to something else. This can produce mixed results.
- On the Menu for the image, select Filters --> Render --> Nature --> Flame
The images shown used this method; however, not all the images in my collection were done with this method. This method will take longer to process. On my athlon64 3000+ the flame render takes about a minute or two.
Starting in the flame dialog:
- Goto tab Camera and set Zoom to "3"
- Optional: Use "1.5" for higher speed.
- Click Edit
- In the "Edit Flame" dialog, set Variation to "Spherical".
- Optional: Sinusoidal also works well at a high zoom.
- Now you must look at the nine boxes. If you like a pattern, choose it. If not, click Randomize. Note, this may be slow.
- When a suitable flame pattern has been chosen click OK.
- In the dialog "Flame" goto the Camera tab and adjust X and Y until you get an image that is fairly centered or otherwise looks good.
- Click OK. Wait a while. This step takes a while!
STEP 3: Color Time
In this step, color is added. I guess you have to decide what color to use. Blue pretty much always works well, and Red rarely works very well as variations in red end up looking purple or yellow. Orange is another good choice. Green is not too hard to get working either.
- In the menu for the image, choose Colors --> Components --> Channel Mixer
- Now, set Output Channel to the color you want to dominate in the image.
- Changing Red, Green, or Blue will make parts of the image that are those color become more or less of the Output Channel Color.
- Adjust the settings here until a desired look is obtained.
- Click OK
- In the GIMP Menu, Choose File --> Save As
Alternate method (this one is a bit easier to get the desired results):
- In the menu for the image, choose Colors --> Colorize
- Either choose one of the preset colors or make your own custom color
- Click OK to apply the settings
- In the GIMP Menu, Choose File --> Save As
and here is my first result:


3 opmerkingen:
The next time I read a blog, Hοpefully it
won't disappoint me as much as this one. I mean, I know it was my choice to read through, nonetheless I really believed you'd have something usеful to talk abοut.
All I heaг is a bunch of comрlаining
about ѕomething you cοulԁ possіbly fix іf you ωere not too busy
looking fοr аttention.
Alsο visit my homepаge ... losing weight after 50 with pilates
I love ωhat you guyѕ arе
usuallу up toо. This type
of сleѵer woгκ аnd reportіng!
Kеep up the wonderful works guуs I’νe aԁԁed you guys tο
my own blogroll.
Αlsο visit my ωeb site
... losing weight after 50 with pilates
Wow, thіs poѕt
is fastidious, my ѕister iѕ analyzing these κіnds of thingѕ, sо
I am goіng to convеy her.
Μy weblog garden
Een reactie posten